Unlock Literacy: K-3 Centers with Magnetic Manipulatives

It’s almost International Literacy Day! No one understands how critical literacy is to academic success more than teachers do. That’s why we’re sharing nine effective literacy center ideas targeting everything from oral language, letter shapes and sounds, and word building, to sentence and paragraph construction! Plus, all these center ideas incorporate learning magnets, making these hands-on literacy center activities even more engaging for kids.
 1. Tell a Story!
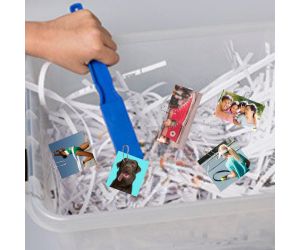
Encourage imaginative storytelling with this interactive story-starting center activity! Start by grabbing images of different objects and scenes. You can find them online (and print) or cut them from magazines. Then, attach a paper clip to each paper pic. (Hint: this prep task is a great one to give to parent volunteers or older students acting as your assistant, if you’re lucky enough to have these helpers!)
Bury the pics in a bucket or tote filled with shredded paper. Provide students with magnet wands and let them “go fish” for a pic. Next, students tell aloud, draw, or write a corresponding story. As students progress in their writing skills, staple together all their stories for an end-of-the year portfolio showing their improvement.
- Differentiation tips – Students who have not developed handwriting skills yet can orally tell the story to a partner or draw a picture. Some students may be ready to write a few sentences or a paragraph. More advanced learners can use a magnet wand to fish for two or three prompts and weave them into a single creative story.
 2. Write a letter!
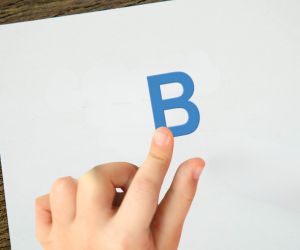
Help your students practice letter recognition and formation in three simple steps! Scatter several soft, squishy, Foam Fun Magnet Letters on a magnetic board or cookie sheet. Instruct each student to choose a letter and trace it with their index finger, saying its name as they trace. (They can also count the number of lines, or strokes, it takes to trace each letter.) Then, have students use the same finger to “write” the letter in the air. Finally, students use a pencil or crayon to write the letter on a sheet of paper.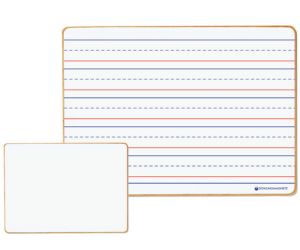
- Differentiation tips: add another sensory twist to this center activity! Provide cookie sheets with rolled out play dough. Students can use their index finger to “write” each letter in the dough. Have a sink in your room for easy hand washing? Swap out the play dough with a thin layer of shaving cream. Students with more advanced fine-motor skills may be ready to practice handwriting using a dry-erase marker and a line-ruled magnetic lap board. (Hint: just make sure they start learning with crayons or pencils first. The “drag” of those tools can benefit students in early handwriting stages.)
 3. Flip a letter!
Students can work on letter identification, letter-sound correspondence, and beginning and ending sounds using a simple center activity featuring our Fun with Letters Magnet Activity Set! Simply spread out the letter tiles face down on a table, and have pairs of students quickly challenge/quiz each other as they flip letters one at a time.
- Differentiation tip: depending on their ability level, the student can say the letter’s name, make its sound, or share a word starting or ending with that letter sound – or all three!
4. Crack the (letter) case!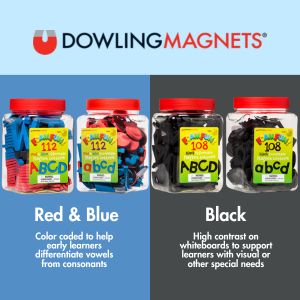
Reinforce the relationship between uppercase and lowercase letters with this fun “search” center! Put a full set of uppercase magnet letters in a big plastic tote on one side of a table, then dump a set of lowercase magnetic letters in another big plastic tote on the other side of the table.
Students take turns picking a letter from the lowercase tote, then scrambling to find its uppercase match in the uppercase tote.
- Differentiation tips: matching uppercase and lowercase letters is challenging for some students, especially if letters look drastically different (“E” and “e” or “G” and “g”). This set’s vowels are color-coded (red), making matching a bit easier. Also, pairing students whose names include some of the same letters—but in different cases—can better support students in this activity. For example, “Noah” (with a lowercase “a”) and “Abby” (with an uppercase “A”) can help each other match “a” and “A.” Advanced students may enjoy the challenge of matching all black letters.
 5. Sort a letter!
Math meets literacy with this center idea featuring our Foam Fun Lowercase Magnet Letters!
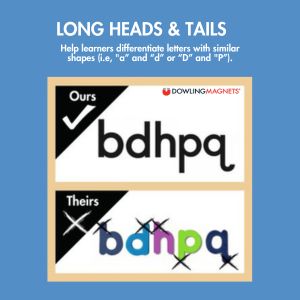
Spread the set on the table with letters at random. Then, challenge students to sort them into groups based on the strokes included: letters with straight lines (such as “b,” “d,” “f,” “h”…and don’t forget that sneaky “e”), letters with curved lines (such as “a,” “b,” “e,” and “g”), letters with high heads (such as “k,” “l,” and “t”), and letters with tails (such as “g,” “j,” “p,” “q,” and “y”).
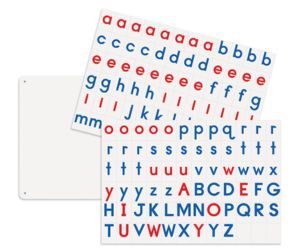
Designed by literacy experts, our Foam Fun magnetic letters feature a modern font with uniform strokes and exaggerated heads and tails to make them easier for early learners to identify.
- Differentiation tips: advanced students may realize that some letters fall into more than one group. Challenge these children to sort the letters in a Venn diagram template, making sure to place letters with overlapping features in the center. These students might also enjoy sorting uppercase and lowercase letters together. Struggling students may be more comfortable – and successful – sorting a smaller set of letters, all the same case.
6. Swap a letter!
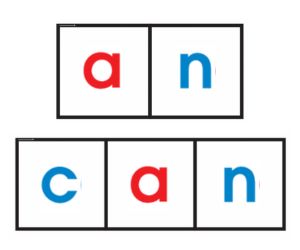 Using our free, printable Elkonin Box templates, students can practice sounding out two-letter words, such as “it,” “an,” “on,” and “up,” touching the letter in each box as they produce its sound. When they’re ready, students can move on to three-letter words. To make this exercise more interactive and engaging, encourage students to place the Foam Fun Lowercase Magnet Letters that match each sound in the appropriate section of the Elkonin Box.
- Differentiation tips: for students who need more literacy and/or fine-motor support, you can pre-select and place on the table only the magnet letters that make up each simple word. Advanced students can sort through the bucket of letters to find the right letters on their own.
7. Make sound-it-out magic words!
Elkonin Boxes help students practice simple word building and reading. Our magnet wands and magnetic chips can make your Elkonin Box lessons even more interactive and fun!
Provide students with an image of a simple CVC word, such as “dog.” Then have them sound out the word as a small group: /d/ /o/ /g/, placing a magnetic, metal-rimmed counting chip in each section of the Elkonin Box, as each sound is spoken. Next, students can repeat those sounds, using the magnetic wand to pick up each chip, as the students orally produce each sound. Finally, have students raise their wands and repeat aloud the word they’ve just sounded out!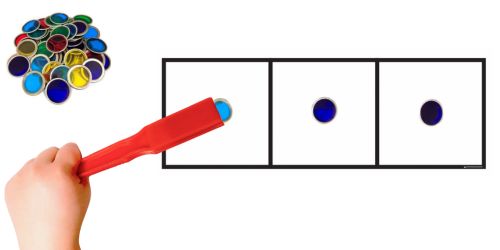
- Differentiation tips: fidgety students can hold several magnetic chips in their non-dominant hand, as they work through this center activity. Advanced students can find the letter magnet that matches the sound in each section of the Elkonin Box, and as they say aloud the sound, they can swap the magnetic chip with the letter.
8. Build CVC words!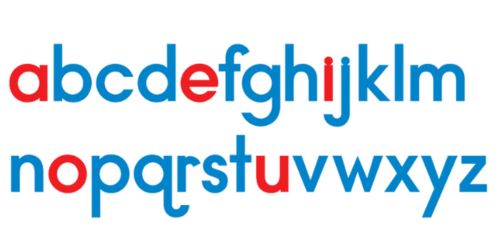
Magnetic letters with color-coded vowels and consonants can help students begin to identify and understand the difference between the two – a critical early literacy skill.
Before students work in centers, teach them (and reinforce) that vowels can make more than one sound – one that sounds like its name and another that does not, while consonants usually make just one sound that doesn’t sound like its name.
Then in a center, students use the red and blue colors as visual cues. As they sort the magnets into separate vowel and consonant piles, they say aloud each letter’s name. Once students can identify vowels and consonants and the sounds they make, they can begin to build CVC words using Foam Fun Magnet Letters and Magnetic Dry-Erase Boards!
- Differentiation tips: provide the Foam Fun letters struggling students need to build specific words but place them in the wrong order on the table or magnetic board. More advanced students can sort through a larger set of letters to find and place the sounds in simple words such as “bus” or “cat.”
9. Write a sentence!
Once students master writing some simple words, they can begin to string them together to create sentences! Provide each student with a Large Magnet Sentence Strip and dry-erase marker, and encourage them to create simple sentences with CVC words, such as “Ann has a red hat.” (If they’re ready, start reminding students to use a capital letter at the start and end punctuation.) Erase and begin again for endless sentence practice!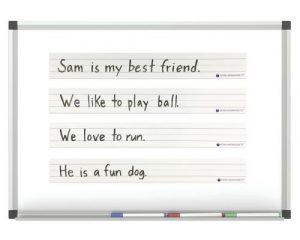
- Differentiation tip: group advanced students together and challenge them to create a paragraph. Some students may even be able to practice using a topic sentence, supporting sentences, and a conclusion sentence. When they’re done, they can post their sentences, in order, on the whiteboard, and read their paragraph to the class later when the whole group comes back together.
Tags: classroom literacy activities , easy literacy centers , foam fun letter magnets , foam fun magnet letters , foam fun magnetic letters , foam letter magnets , foam magnet letters , foam magnetic letters , hands-on literacy activities , hands-on literacy centers , hands-on reading activities , learning to read , letter magnets , literacy activities , literacy center activities , literacy centers , literacy magnets , literacy manipulatives , magnet letters , magnetic classroom tools , Magnetic letters , magnetic teaching tools , reading magnets , reading manipulatives
Share This: