Six Simple and Sweet Early Literacy Games Using Magnets!
 When it comes to early literacy, the more senses you engage, the better! Each of the awesome, hands-on activities below engages your students in multiple ways, resulting in serious learning that really sticks!
Sing, Listen, and Learn!
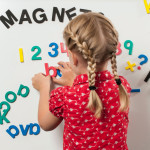
Help young learners master the alphabet with our Fun with Letters Magnet Activity Set! Place the letters, in alphabetical order, on a Magnetic Dry-Erase Board, then get in tune with “The Alphabet Song,” touching each letter as you sing it. Next have the children take turns touching each letter as you sing the song together again and again. This sensory approach combines oral, aural, tactile, and kinesthetic experiences in a single activity to keep little learners engaged.
Differentiation hint:
If a child still does not know letter names at all yet, hold her hand (as she’s extending her index finger) and guide her in pointing to each letter throughout the sound.
Point the Way!
Incorporate tactile learning in an early writing activity designed to point students in the right direction! First, have students use their index fingers to point to the sky and “air write” a specific letter that you announce. Later in learning centers, kids can use their finger to trace the shape of the corresponding soft, squishy, super-satisfying Foam Fun® letter. When they’re ready, they can practice actually writing the letters using pencil and paper and eventually a Magnetic Dry-Erase Board and a small, thin marker (sold separately), as you model correct handwriting using a Large (Line-Ruled) Magnet Sentence Strip on the classroom whiteboard.
Differentiation hint:
Children who gravitate toward richer sensory experiences may prefer to finger draw letter shapes in shaving cream that is sprayed and spread in a thin layer on a tabletop.
Flip It!
Our Fun with Letters Magnet Activity Set is the perfect way to work on letter-sound correspondence. Turn over all the letters in the set face down, then invite each student to flip a letter in turn. Depending on their ability levels, students can either identify the letter they’ve flipped, produce the sound it makes, or say a word that begins or ends with that letter’s sound.
Differentiation hint:
Students may benefit from an introduction or quick review of phonics before this center. The Let’s Build™ Words Magnet Set is perfectly sized for phonics demonstration at the front of the room. Letters measure 3”H and are color-coded (red vowels, blue consonants) just like the Fun with Letters set!
Move and Make a Match!
Get kids up and moving with a fun, physical letter-matching activity! Assign each student a letter, then dump a set of Foam Fun letters on the floor and let children search and scramble for the uppercase or lowercase match.
Differentiation hint:
Many children struggle with relating uppercase letters to their lowercase counterparts, especially if the letters’ two cases look very different. Strategically pair students with buddies for extra support and suggest that they say aloud the letter name to each other before searching for the match. (Sometimes the letters in a student’s name will give you a clue as to whether they know the letter shape. For example, if you pair a child named “Noah”—who probably knows lowercase “a”—with an “Abby”—who is likely familiar with uppercase “A”—hopefully together they will make the mental connection between the two A/a’s!)
Sort It Out!
Engage the left and right sides of the brain with a letter shape sort, the perfect center activity! Dump a set of Foam Fun letters on the table and ask students to sort them into two groups—one set of letters composed of at least one straight line (b, d, e, f, h, i, k, l…) and another set containing letters with curved lines (a, b, c, d, e, f, g…). When students are ready to progress to a more difficult activity, try sorting into groups of high “heads” (b, d, f, h, k, l, t) and low “tails” (g, j, p, q, y).
Differentiation hints:
- More advanced students could conclude that there are some letters that may fall into both groups. Guide these students to sort letters onto a Venn diagram template—show them how to place the letters that fit in both groups in the diagram’s overlapping center space.
- You may also ask advanced students to try the same sort with both uppercase and lowercase letters combined—that’s twice as many letters to sort!
- Give students who are struggling a smaller number of letters (all the same case) to sort so they can be successful.
Zap Those Sounds!
Elkonin Boxes are a wonderful, hands-on way to help students discriminate, isolate, add, and blend phonemes (sounds), which are key foundational literacy skills.
Make the boxes even more interactive with our Magnet Wand! Start by showing your student a simple picture, then say the word aloud, sound by sound (/M/ /A/ /P/ for example), placing one chip in each section of the Elkonin Box as you say each sound again. Next, encourage your student to repeat the sounds you’ve made, and to touch each chip as they do. Finally, ask the student to repeat each sound one more time, magically “zapping” (picking up) each chip with the Magnet Wand as its sound is spoken.
Differentiation hints:
- Let fidgety students hold/rub more chips in one hand to stay occupied as they work.
- Challenge more advanced students to find the magnetic letters they need to build the word and then replace each chip (with the correct letter) in each box.
Share This:
